IntroductionStainless steel quick connectors have become indispensable components in modern fluid handling systems across industries ranging from food processing and pharmaceuticals to chemical manufacturing and automotive applications. Their ability to provide rapid, leak-free connections without specialized tools makes them invaluable for maintenance operations and system modifications. However, proper installation is critical to ensure optimal performance, longevity, and safety. This comprehensive guide will walk you through everything you need to know about installing stainless steel quick connectors correctly.
Understanding Stainless Steel Quick Connectors
What Are Quick Connectors?
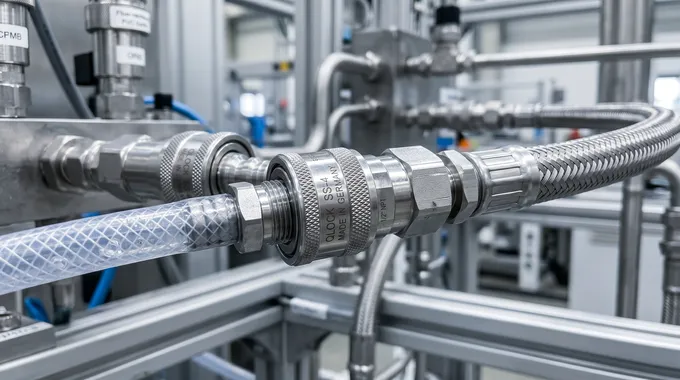
Quick connectors, also known as quick-disconnect couplings or QDs, are mechanical devices designed to connect and disconnect fluid lines rapidly without the need for tools. They consist of two main components: a male plug (nipple) and a female socket (coupler). When joined together, they create a sealed pathway for fluids or gases to flow through.
Why Choose Stainless Steel?
Stainless steel quick connectors offer several distinct advantages over other materials:
Corrosion Resistance: Stainless steel, particularly grades 304 and 316, provides excellent resistance to corrosion, making these connectors ideal for harsh environments, outdoor applications, and exposure to chemicals or saltwater.
Temperature Tolerance: These connectors can withstand extreme temperatures, from cryogenic conditions to high-heat applications up to 400°F (204°C) or higher, depending on the seal material.
Durability and Strength: Stainless steel offers superior mechanical strength and resistance to wear, ensuring long service life even under frequent connection/disconnection cycles.
Hygienic Properties: The smooth, non-porous surface of stainless steel prevents bacterial growth and is easy to clean, making it perfect for food, beverage, and pharmaceutical applications.
Aesthetic Appeal: The polished finish of stainless steel connectors provides a professional appearance suitable for visible installations.
Pre-Installation Preparation
Safety First
Before beginning any installation work, prioritize safety:
Depressurize the System: Ensure all pressure is relieved from the lines before attempting to install or remove connectors. Working with pressurized systems can result in serious injury.
Wear Protective Equipment: Use appropriate personal protective equipment (PPE), including safety glasses, gloves, and protective clothing.
Verify Fluid Compatibility: Confirm that the connector materials are compatible with the fluids being transported. Check chemical compatibility charts for seals and wetted parts.
Work in a Clean Environment: Contamination can compromise seal integrity and system performance. Keep work areas clean and free from debris.
Tools and Materials Required
Gather the following items before starting:
Stainless steel quick connector set (plug and socket)
Appropriate tubing or piping
Tube cutter or pipe cutter (for clean cuts)
Deburring tool or file
Measuring tape or ruler
Marker or scribe
Thread sealant or PTFE tape (if applicable)
Cleaning supplies (isopropyl alcohol and lint-free cloths)
Torque wrench (for threaded connections)
Inspection mirror and flashlight
Inspecting Components
Thoroughly inspect all components before installation:
Check for Damage: Examine connectors for dents, scratches, cracks, or other visible damage. Damaged components should never be installed.
Verify Seal Condition: Inspect O-rings and seals for nicks, cuts, or deformation. Replace any compromised seals immediately.
Confirm Specifications: Ensure connector size, thread type, and pressure ratings match your application requirements.
Clean Components: Remove any protective coatings, dirt, or debris using appropriate cleaning agents. Allow components to dry completely.
Step-by-Step Installation Process
Step 1: Prepare the Tubing or Piping
Proper tube preparation is crucial for achieving leak-free connections:
Cutting the Tube:
Use a sharp tube cutter to make a clean, square cut perpendicular to the tube axis.
Avoid using saws or abrasive cutting tools that can create burrs or irregular edges.
For stainless steel tubing, use a cutter specifically designed for hard materials.
Deburring:
Remove all internal and external burrs using a deburring tool.
Internal burrs can restrict flow and create turbulence, while external burrs can damage seals during insertion.
File the cut edge lightly to create a slight chamfer (approximately 15-20 degrees) to facilitate easier insertion.
Cleaning:
Wipe the tube end with isopropyl alcohol to remove oils, dirt, and metal particles.
Ensure the tube is completely dry before proceeding.
Inspect the cleaned end under good lighting to verify it's free from defects.
Step 2: Verify Connector Orientation
Understanding connector orientation prevents common installation errors:
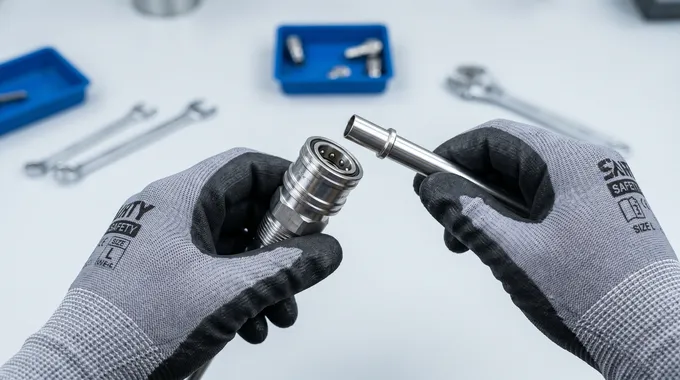
Identify Plug and Socket:
The plug (male component) typically has external threads or a protruding nipple.
The socket (female component) contains the locking mechanism and internal sealing elements.
Some connectors are marked with arrows indicating flow direction—pay attention to these markings.
Check Locking Mechanism:
Familiarize yourself with the specific locking mechanism (ball-lock, sleeve-lock, or push-to-connect).
Test the locking action several times to understand the force required and the audible/visual confirmation of proper engagement.
Step 3: Install the Connector onto Tubing
The installation method varies slightly depending on connector design:
For Threaded Connections:
Apply thread sealant or wrap PTFE tape clockwise around male threads (2-3 wraps maximum).
Hand-tighten the connector onto the tubing or fitting.
Use a torque wrench to tighten to manufacturer specifications (typically 15-25 ft-lbs for 1/2" connections, but verify with your specific product documentation).
Avoid overtightening, which can damage threads or distort sealing surfaces.
For Push-to-Connect Fittings:
Ensure the tube end is properly prepared (cut square, deburred, and cleaned).
Insert the tube firmly into the connector until it bottoms out.
You should feel a distinct "click" or resistance change indicating proper seating.
Gently pull back on the tube to verify it's locked in place.
Some designs require pushing a release collar forward during insertion—consult manufacturer instructions.
For Clamp-Style Connections:
Slide the clamp onto the tubing before inserting the connector nipple.
Insert the tubing fully onto the connector nipple.
Position the clamp over the junction area.
Tighten the clamp evenly using appropriate tools, following torque specifications.
Step 4: Connect Plug to Socket
Making the actual connection between plug and socket:
Align Components: Hold the plug and socket in line with each other, ensuring proper orientation.
Insert Plug: Push the plug into the socket firmly and steadily.
Listen for Click: Most quick connectors produce an audible click when properly engaged.
Visual Confirmation: Many designs feature a visual indicator (colored band, exposed ring, or window) showing secure connection.
Tug Test: Gently pull on both ends to verify the connection is secure. There should be no movement or separation.
Step 5: Pressure Testing
Never skip the pressure testing phase:
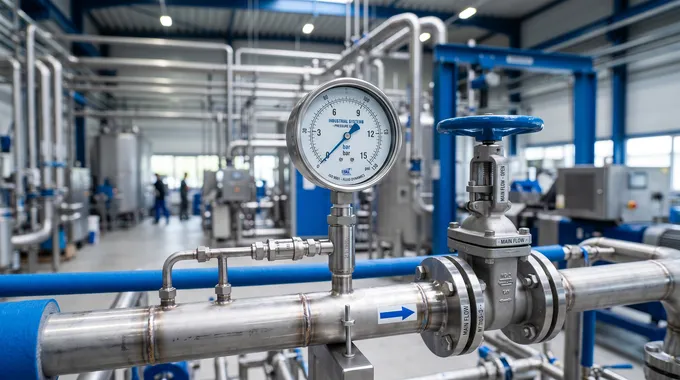
Gradual Pressurization: Slowly introduce pressure to the system, starting at 25% of operating pressure.
Initial Inspection: Check for visible leaks, unusual sounds, or connector movement.
Increase Pressure: Gradually increase to 50%, then 75%, and finally 100% of operating pressure.
Hold and Observe: Maintain full operating pressure for at least 5-10 minutes while monitoring for leaks.
Soap Solution Test: For gas applications or hard-to-see areas, apply soapy water to connections. Bubbles indicate leaks.
Document Results: Record test pressures, durations, and observations for quality assurance records.
Common Installation Mistakes to Avoid
Problem 1: Improper Tube Preparation
Rough cuts, burrs, or contaminated tube ends cause seal damage and leaks.
Solution: Always use proper cutting tools, deburr thoroughly, and clean tube ends before installation.
Problem 2: Overtightening Threaded Connections
Excessive torque distorts threads, cracks fittings, or compresses seals beyond their elastic limit.
Solution: Use a torque wrench and follow manufacturer specifications precisely. Remember: snug is not tight.
Problem 3: Ignoring Flow Direction
Installing connectors backward can cause improper sealing, restricted flow, or premature failure.
Solution: Always check for flow direction arrows and install accordingly. When in doubt, consult product documentation.
Problem 4: Mixing Incompatible Components
Using connectors from different manufacturers or mixing incompatible seal materials leads to failures.
Solution: Use matched sets from the same manufacturer and verify material compatibility with your application.
Problem 5: Skipping Pressure Tests
Undetected leaks or weak connections fail during operation, causing downtime or safety hazards.
Solution: Never skip pressure testing. Make it a standard part of your installation procedure.
Maintenance and Troubleshooting
Regular Maintenance Schedule
To ensure long-term reliability:
Monthly Visual Inspections: Check for signs of leakage, corrosion, or physical damage.
Quarterly Functional Tests: Disconnect and reconnect to verify smooth operation.
Annual Seal Replacement: Proactively replace O-rings and seals, even if they appear functional.
Cleaning: Periodically clean connectors with appropriate solvents to remove buildup.
Troubleshooting Common Issues
Leaking Connections:
Verify proper tube preparation and insertion depth
Check seal condition and replace if damaged
Ensure connector is fully engaged (listen for click)
Verify pressure ratings match application requirements
Difficulty Connecting/Disconnecting:
Inspect for debris or contamination in locking mechanism
Lubricate with manufacturer-approved lubricant if permitted
Check for damaged locking balls or sleeves
Verify you're using the correct disengagement procedure
Premature Wear:
Evaluate connection/disconnection frequency against connector rating
Check for misalignment causing side loading
Verify operating temperature and pressure are within specifications
Consider upgrading to heavy-duty models for high-cycle applications
Best Practices for Optimal Performance
Document Everything: Keep records of installation dates, torque values, test results, and maintenance activities.
Train Personnel: Ensure all technicians receive proper training on connector installation and maintenance procedures.
Use Quality Components: Invest in reputable brands with proven track records rather than opting for the cheapest option.
Maintain Spare Parts Inventory: Keep replacement seals, O-rings, and complete connector sets on hand to minimize downtime.
Follow Manufacturer Guidelines: Always refer to specific product documentation for installation torque, temperature limits, and compatibility information.
Implement Preventive Replacement: Replace connectors proactively based on cycle count or time in service, rather than waiting for failure.
Protect During Storage: Store unused connectors in original packaging or clean, dry containers to prevent contamination.
Conclusion
Proper installation of stainless steel quick connectors is fundamental to achieving reliable, leak-free performance in fluid handling systems. By following the systematic approach outlined in this guide—preparing tubes correctly, understanding connector mechanics, executing precise installation steps, and conducting thorough pressure testing—you can ensure optimal performance and longevity.
Remember that attention to detail during installation pays dividends in reduced maintenance costs, minimized downtime, and enhanced safety. Take the time to do it right the first time, and your stainless steel quick connectors will serve you reliably for years to come.
Whether you're working in food processing, chemical manufacturing, pharmaceutical production, or any other industry requiring robust fluid connections, mastering these installation techniques will elevate your work quality and professional reputation. Stay safe, stay precise, and keep your systems running smoothly.
For more technical guides and industry insights, follow our official account. Share this article with colleagues who might benefit from these installation best practices.


